Single Tooth or Full Arch? A Decision Map for Structural Replacement
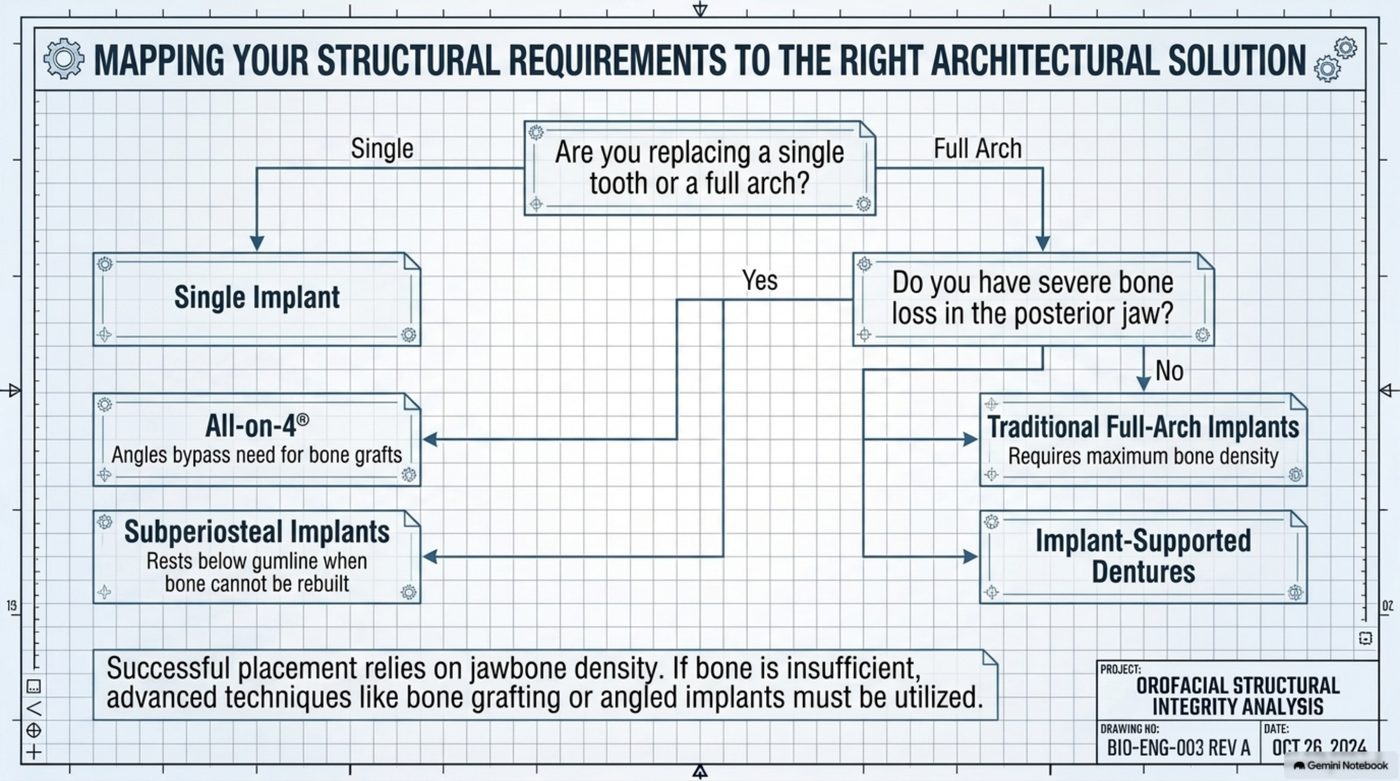
Slide 4 of the deck stops lecturing and becomes a flow chart. The first question is not about cost or materials, it is whether you are replacing one tooth or a full arch. The second asks whether the posterior jaw has lost severe bone. Follow the branches and you reach five structurally different answers. Here is the map, read aloud.
Why This Slide Is a Flow Chart
Structural replacement is not one procedure with different price tags. It is a set of architectures, and each has to fit the foundation you have. A single missing tooth and a failing full arch are not the same problem at different scales: they load the jaw differently, they demand different amounts of bone, and they fail in different ways. The tree exists so that the answer is chosen by your jaw rather than by a brochure.
First Branch: One Tooth or a Full Arch
The tree opens by asking whether a single tooth or a full arch needs replacing. Everything downstream depends on that split, because it sets how many anchor points the structure will have and how chewing force gets distributed. One tooth means a single point of load and one site to heal. A full arch means an entire chewing surface rebuilt on a limited number of anchors, which turns bone availability into the deciding constraint.
Answer that it is one tooth and the tree points straight to a single implant with no further questions. It is the simplest branch because the foundation is usually already there: the bone that held the original root is still loaded by the teeth on either side. The site still has to be checked for width and density, but the bar is lower than for a full arch, which is why most patients meet this branch first. If you want that decision in detail, single tooth implants in Cape Coral covers it at that scale.
Full Arch, Branch Two: Severe Posterior Bone Loss
Choose the full arch and the tree asks a second question: is there severe bone loss in the posterior jaw? The back of the jaw carries the heaviest chewing force, and sinus anatomy and the mandibular canal limit how much implant length is usable. When that region has lost height or width, the straightforward path closes, and the branches that follow are different strategies for one problem: not enough bone where the posts should go.
The Full-Arch Options, Branch by Branch
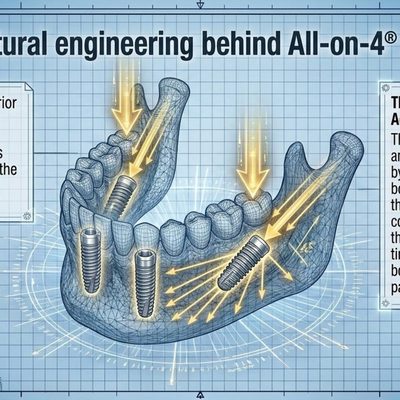
The first branch leads to All-on-4, and the deck's note is the entire argument for the technique: angles bypass the need for bone grafts. By angling the posterior implants, load is redirected into bone that is still dense, so the areas that have shrunk are engineered around instead of rebuilt. All-on-4 implants in Cape Coral are usually the branch that changes the answer for patients who were told they were not candidates.
The second branch, traditional full-arch implants, is the mirror image: requires maximum bone density. This approach places individual implants across the arch in the positions a natural dentition occupied. It produces the most distributed load path here, and asks the most of your jaw. When it fits, the tree moves on.
The third branch is subperiosteal implants, which rest below the gum line when bone cannot be rebuilt. Rather than sitting inside the bone, the framework rests on what remains under the gum, with the restoration built above it. It is a minority branch, on the map because some jaws cannot be reconstructed to the density the other branches demand.
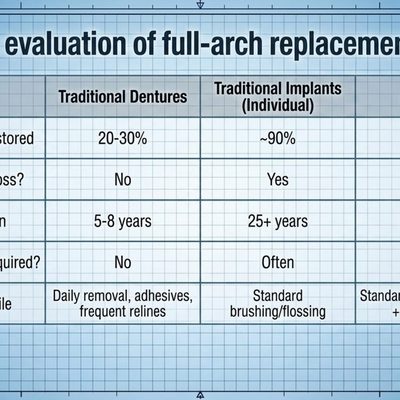
The fourth branch is implant-supported dentures. Here the implants act as anchors for a full arch that can still be removed. It suits patients who want integrated anchors without committing to a permanently fixed restoration, and it is the closest relative to the compression-based denture the deck measures everything against.
| Branch | Option | Deck annotation |
|---|---|---|
| Replacing one tooth | Single implant | The one-tooth branch of the tree |
| Full arch with severe posterior bone loss | All-on-4 | Angles bypass need for bone grafts |
| Full arch with bone available | Traditional full-arch implants | Requires maximum bone density |
| Full arch where bone cannot be rebuilt | Subperiosteal implants | Rests below gum line |
| Full arch anchored but removable | Implant-supported dentures | The final branch on the tree |
Jawbone Density Is the Load-Bearing Variable
Underneath the flow chart sits one sentence that governs every branch: successful placement relies on jawbone density. That is the deck's version of an engineering tolerance. A structure can only carry what its foundation can distribute, and in the jaw the foundation is bone. Density decides whether an implant can be placed in a given position, how long it can be, and how much load it can carry once fused. It is also why the tree asks about bone loss rather than symptoms: two patients with identical complaints can sit on different branches because their scans are not identical.
That reframes the conversation. The productive question at a consultation is not which option is best, it is which one your density permits, and that ordering makes the slide a decision map rather than a menu.
When Bone Is Insufficient: Grafting and Angled Implants
The deck is direct about the fallback: if bone is insufficient, advanced techniques like bone grafting or angled implants must be utilized. Those are the two ways out of a thin foundation. Grafting rebuilds what is missing and then waits for it to mature into loadable bone, which is what bone grafting for implants is for. Angled implants, the ones behind All-on-4, avoid the missing region entirely by changing the geometry of the load path. One strategy fixes the foundation, the other works around it, and which applies depends on how much bone remains and where.
The full-arch options comparison matrix sets these branches side by side if you would rather see the trade-offs on one page.
Choosing a Branch Without Guessing
A flow chart only helps if you know which question you are answering, and most patients do not. The existing funnel takes the same structure this slide uses, starts from your situation, and shows which questions come next and what each branch requires. Working through it before a consultation means the appointment goes to your decision, not the diagram.
Frequently asked questions
Can I start with a single implant and move to a full arch later?
The two branches answer different questions, so they are not usually mixed. If one tooth is failing, the single implant branch keeps load on the bone that is still working. If the whole arch is failing, adding one implant does not rebuild the arch, so the branch you take should match the structure you have.
Does bone loss rule out implants completely?
No, and that is why the second question is on the tree. Severe posterior bone loss closes the traditional full-arch branch but opens the route to All-on-4, where angles bypass the need for bone grafts. Where bone cannot be rebuilt, subperiosteal implants rest below the gum line. Loss changes your branch, it does not end the map.
What is the difference between All-on-4 and traditional full-arch implants?
Mostly it is where the posts go and what they ask of your jaw. All-on-4 redirects load into denser bone with angled implants, which lets it bypass grafting. Traditional full-arch implants place more anchors in the positions nature used, which distributes load widely but requires maximum bone density.
If you are on the full-arch side of the tree and want to know which branch your jaw supports, a local evaluation will tell you. Cape Coral providers listed on this site offer that at no cost and no obligation, and you can get matched with Cape Coral providers to start.
This guide expands slide 04 of Engineered for Life: The Biomechanics and Economics of Dental Implants
For the complete slide-by-slide narrative, read the full deck walkthrough.